How to Get Started with DeFi? Try WalletConnect
What is your impression of crypto wallets? Some might say that they are pro-only applications that are difficult to use.
As for DeFi & DApps, many people would suggest that such projects are even less accessible.
If someone combined DeFi & DApps with crypto wallets, the end product would scare away most ordinary users.
The DeFi boom happened faster than a speeding bullet.
Since the latter half of 2020, the sudden boom of DeFi has sparked strong market excitement, and legends of cryptos with tenfold or a-hundredfold gains spread all over the crypto community. However, most ordinary users can only read the success stories of others with envy while sighing at the “long-standing” cryptos that they have held forever.
Apart from the DeFi boom overnight that caught many unprepared, the high threshold of DApps has also contributed to the exclusiveness of DeFi.
It has been two months since DeFi went viral, and most veteran crypto users who have remained active in the crypto community find it difficult to use DApps and invest in DeFi.
A complete investment, whether it is made in conventional finance or the blockchain world, can be simplified into several steps: invest funds, buy, sell, and get returns.
However, most users who plan to invest in DeFi fail to complete the very first step — invest funds. Yes, that’s right: in the world of DeFi, money does not grant you access to everything because you might not even know how to deposit your funds.
For instance, when investing in projects on crypto exchanges, it is easy to deposit funds into a centralized exchange (CEX): just create an account, deposit cryptos to the address provided by the exchange, and wait for the deposit to arrive.
When using a decentralized exchange (DEX), users also need to create an account, but the account required by DEXes is an Ethereum address. In this case, users can choose to create a new address or import an existing address by entering the private key.
If multiple DApps are used at the same time, users either have to create multiple wallets, back them up, and remember the DApp to which each wallet corresponds, or connect the same private key with the Internet multiple times. However, no matter which method is selected, users must deal with cumbersome operations or compromised security.
If users can directly run DApps in their wallets, they would not have to stand such tedious, difficult operations, and the investment process can be streamlined into: invest funds, buy, sell, and get returns. Meanwhile, they would not need to enter the private key in different DApps over and over again, which could put their wallet at risk.
Having solved all the above concerns, MetaMask became the most popular choice of DApp users in the early days.

MetaMask is a unique wallet — it is a browser plugin wallet that does not require users to download or install a client. Instead, users can get started with MetaMask by simply adding a browser extension.
When a user runs an Ethereum DApp on a browser equipped with the MetaMask extension, a dialog box will pop up, asking the user to enter a cryptographic signature. Once the signature is saved in the reducer, API can be called for authentication. After the authentication is completed, the user can then directly log in to a DApp via MetaMask.
For many people, this process is almost as difficult as the previous one. After all, many users don’t even know what MetaMask is, let alone using a browser plugin wallet. Most beginners are at a total loss after reading a MetaMask tutorial and will probably give up unless an experienced user is there to guide them.
Apart from the above issue, MetaMask, which is a browser plugin wallet, does not match most users’ habits. In an age of mobile Internet, people have grown used to using their phones for everything. With a mobile crypto wallet, we can manage our cryptos anytime and anywhere, which is not possible when using MetaMask to log in to DApps.
Therefore, connecting web-based DApps with mobile wallets has become a new solution.
In real life, as mobile payment becomes increasingly popular, when purchasing services on a website, we scan a QR code and enter the password in our phone to complete the payment.
Transplanting this framework into the field of DApp has enabled the birth of WalletConnect.
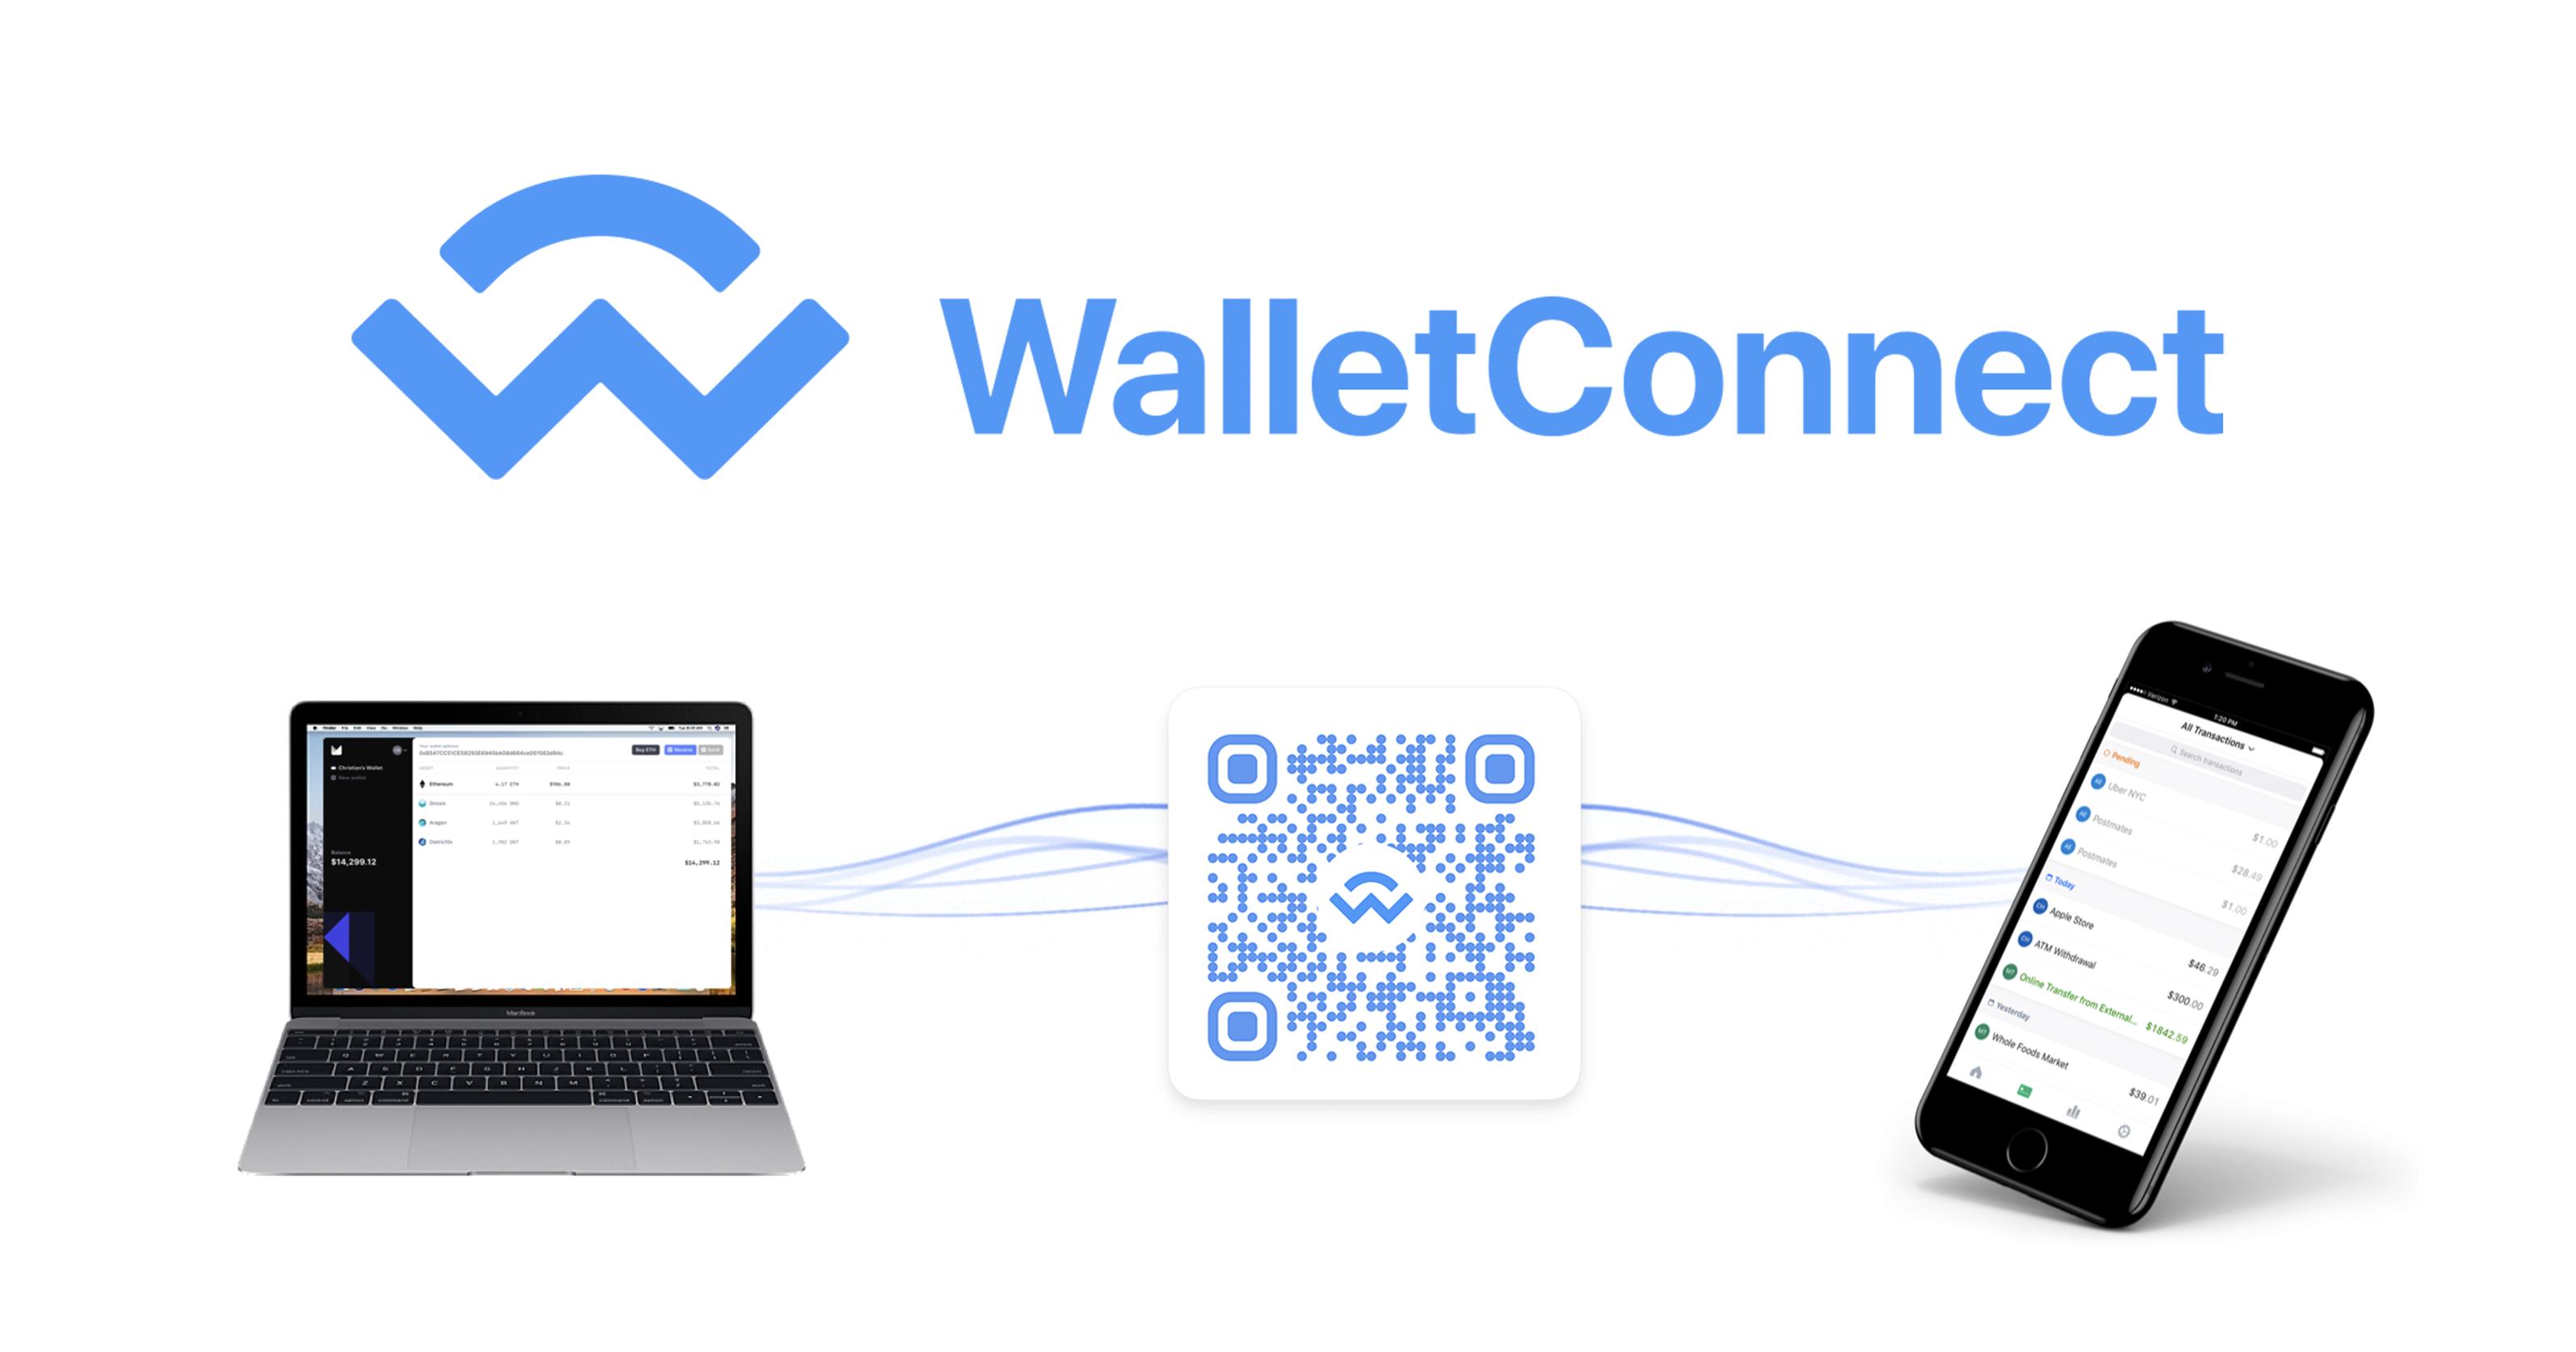
WalletConnect is essentially a set of open communication standards made to facilitate an encrypted connection between mobile wallets and DApps. Using WalletConnect, users can scan the QR code provided by a web-based DApp in their mobile wallet to have them connected. In addition, when a user is using a DApp, once an operation that involves gas consumption is performed or a transaction is initiated, a notice will pop up in the mobile wallet, and the user only needs to enter the password to confirm the transaction.
Apart from convenience, the biggest advantage of WalletConnect is that users only have to confirm transactions using their private key in the mobile wallet throughout the connection process, which significantly improves the security of each operation.
At the request of uses, CoinEx Wallet (V2.1.4) now supports WalletConnect. Right now, CoinEx Wallet users can scan a QR code to give authorization and get connected to a web-based DApp, which allows them to carry out on-chain transactions or execute smart contracts quickly and conveniently.
Let’s see how Uniswap can be connected with WalletConnect:
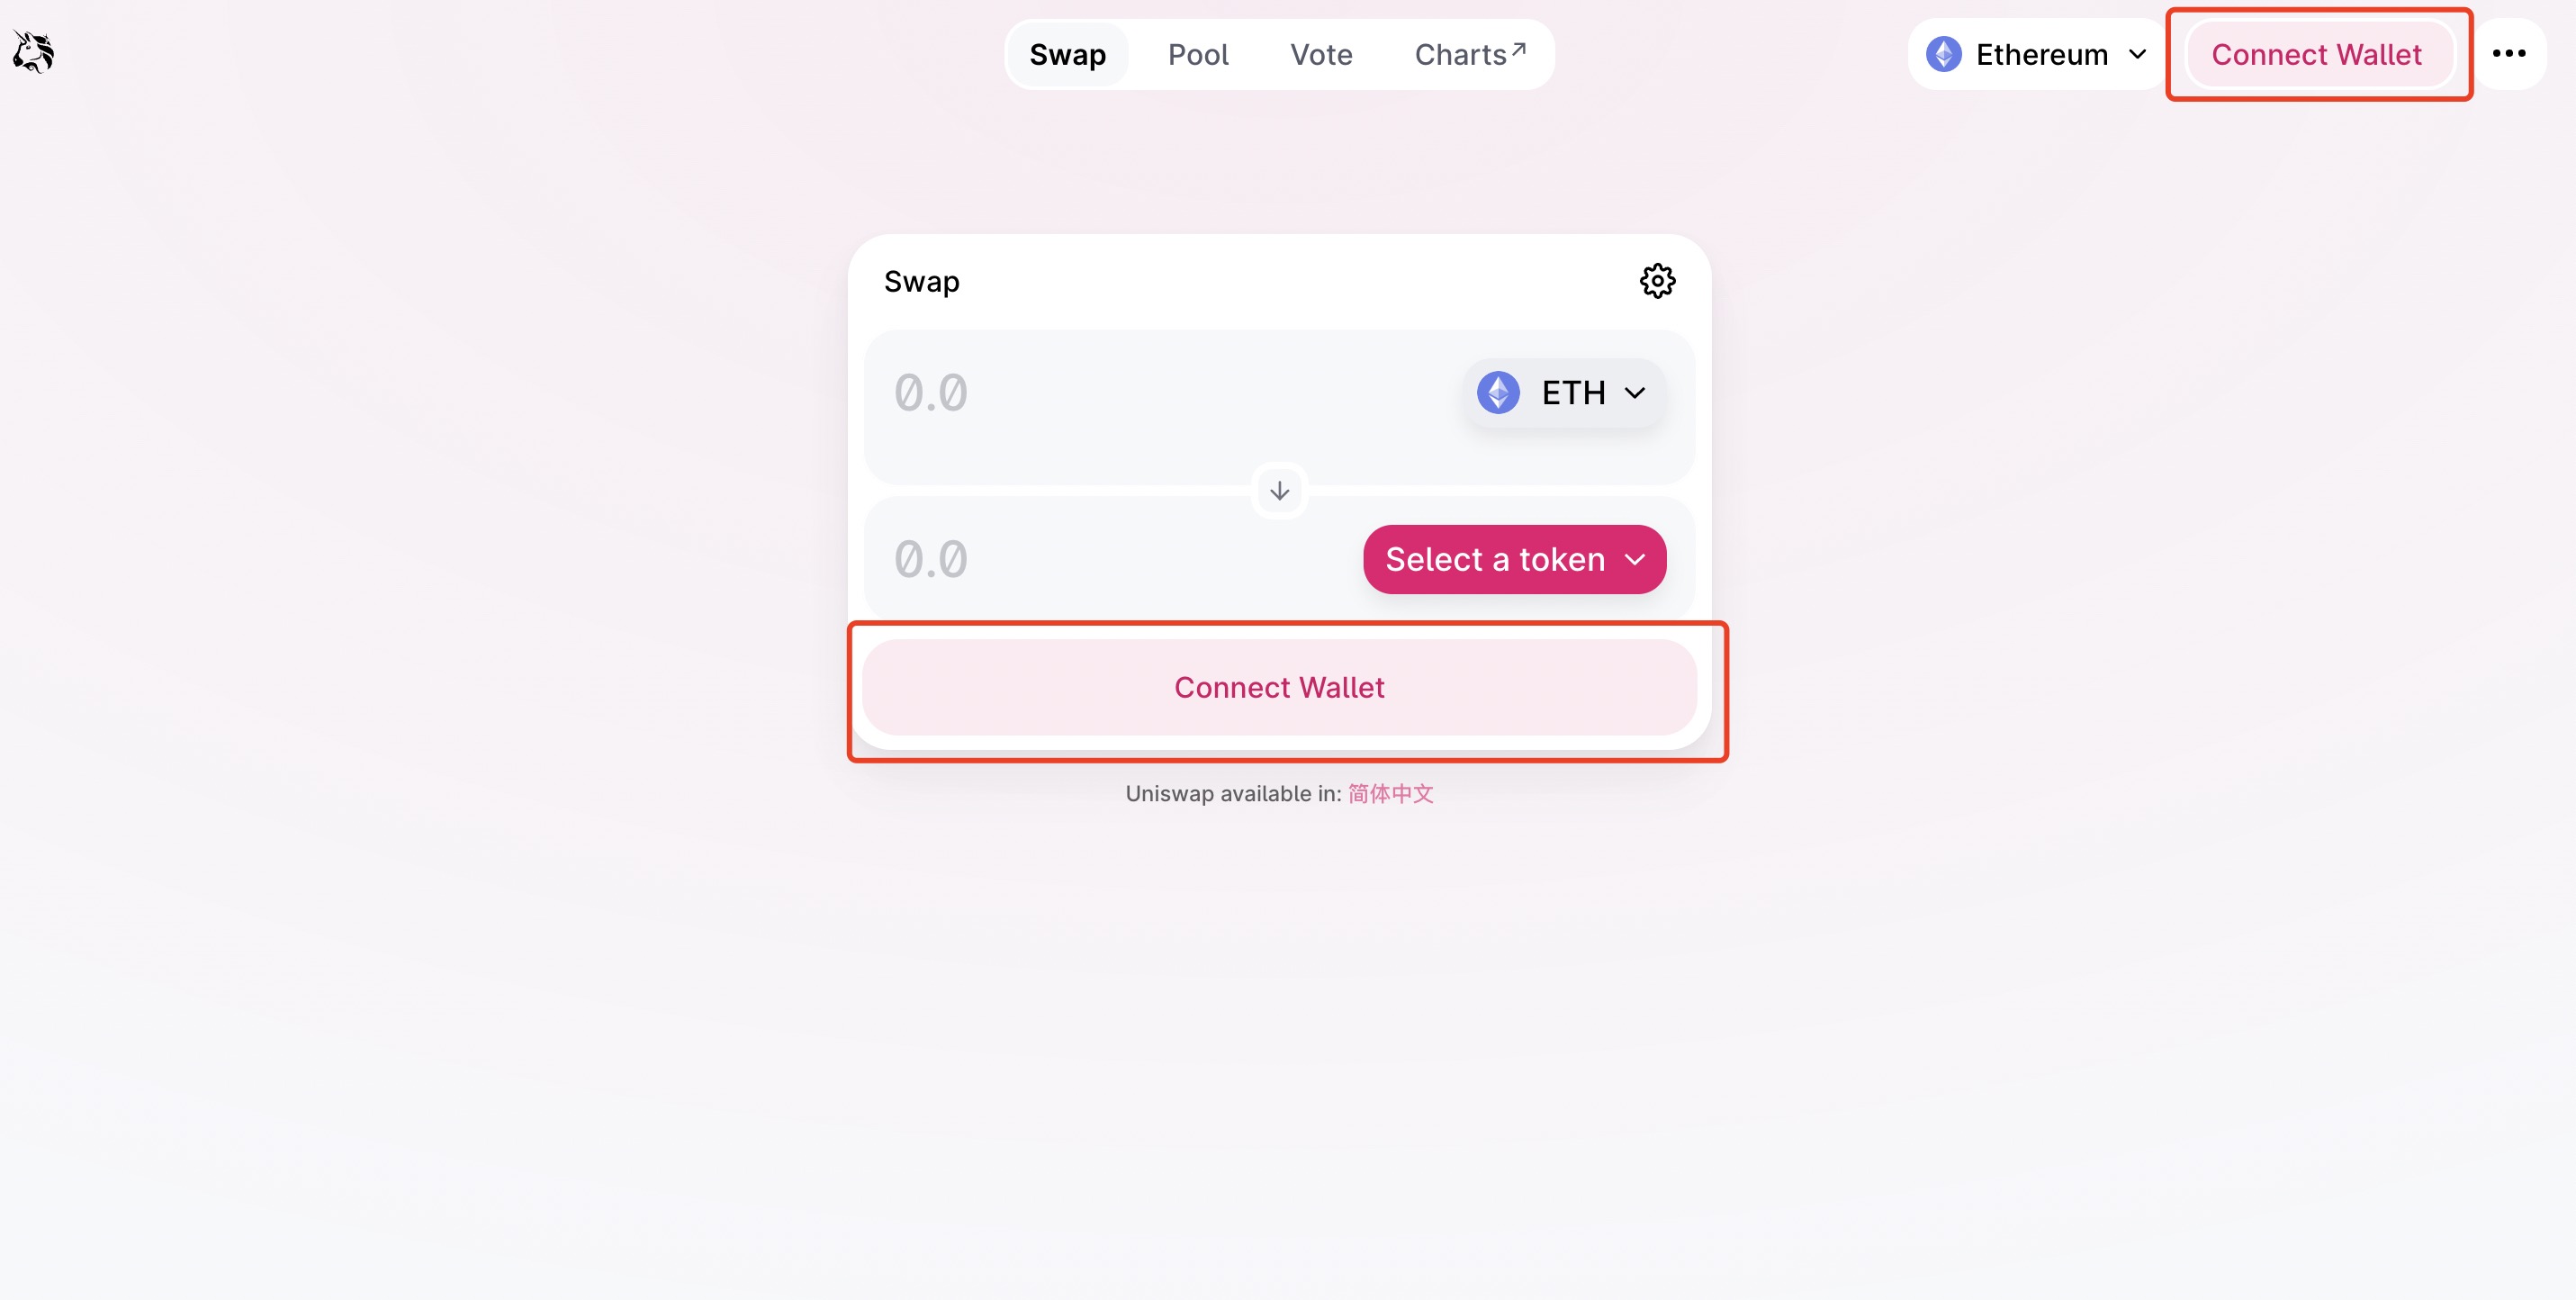
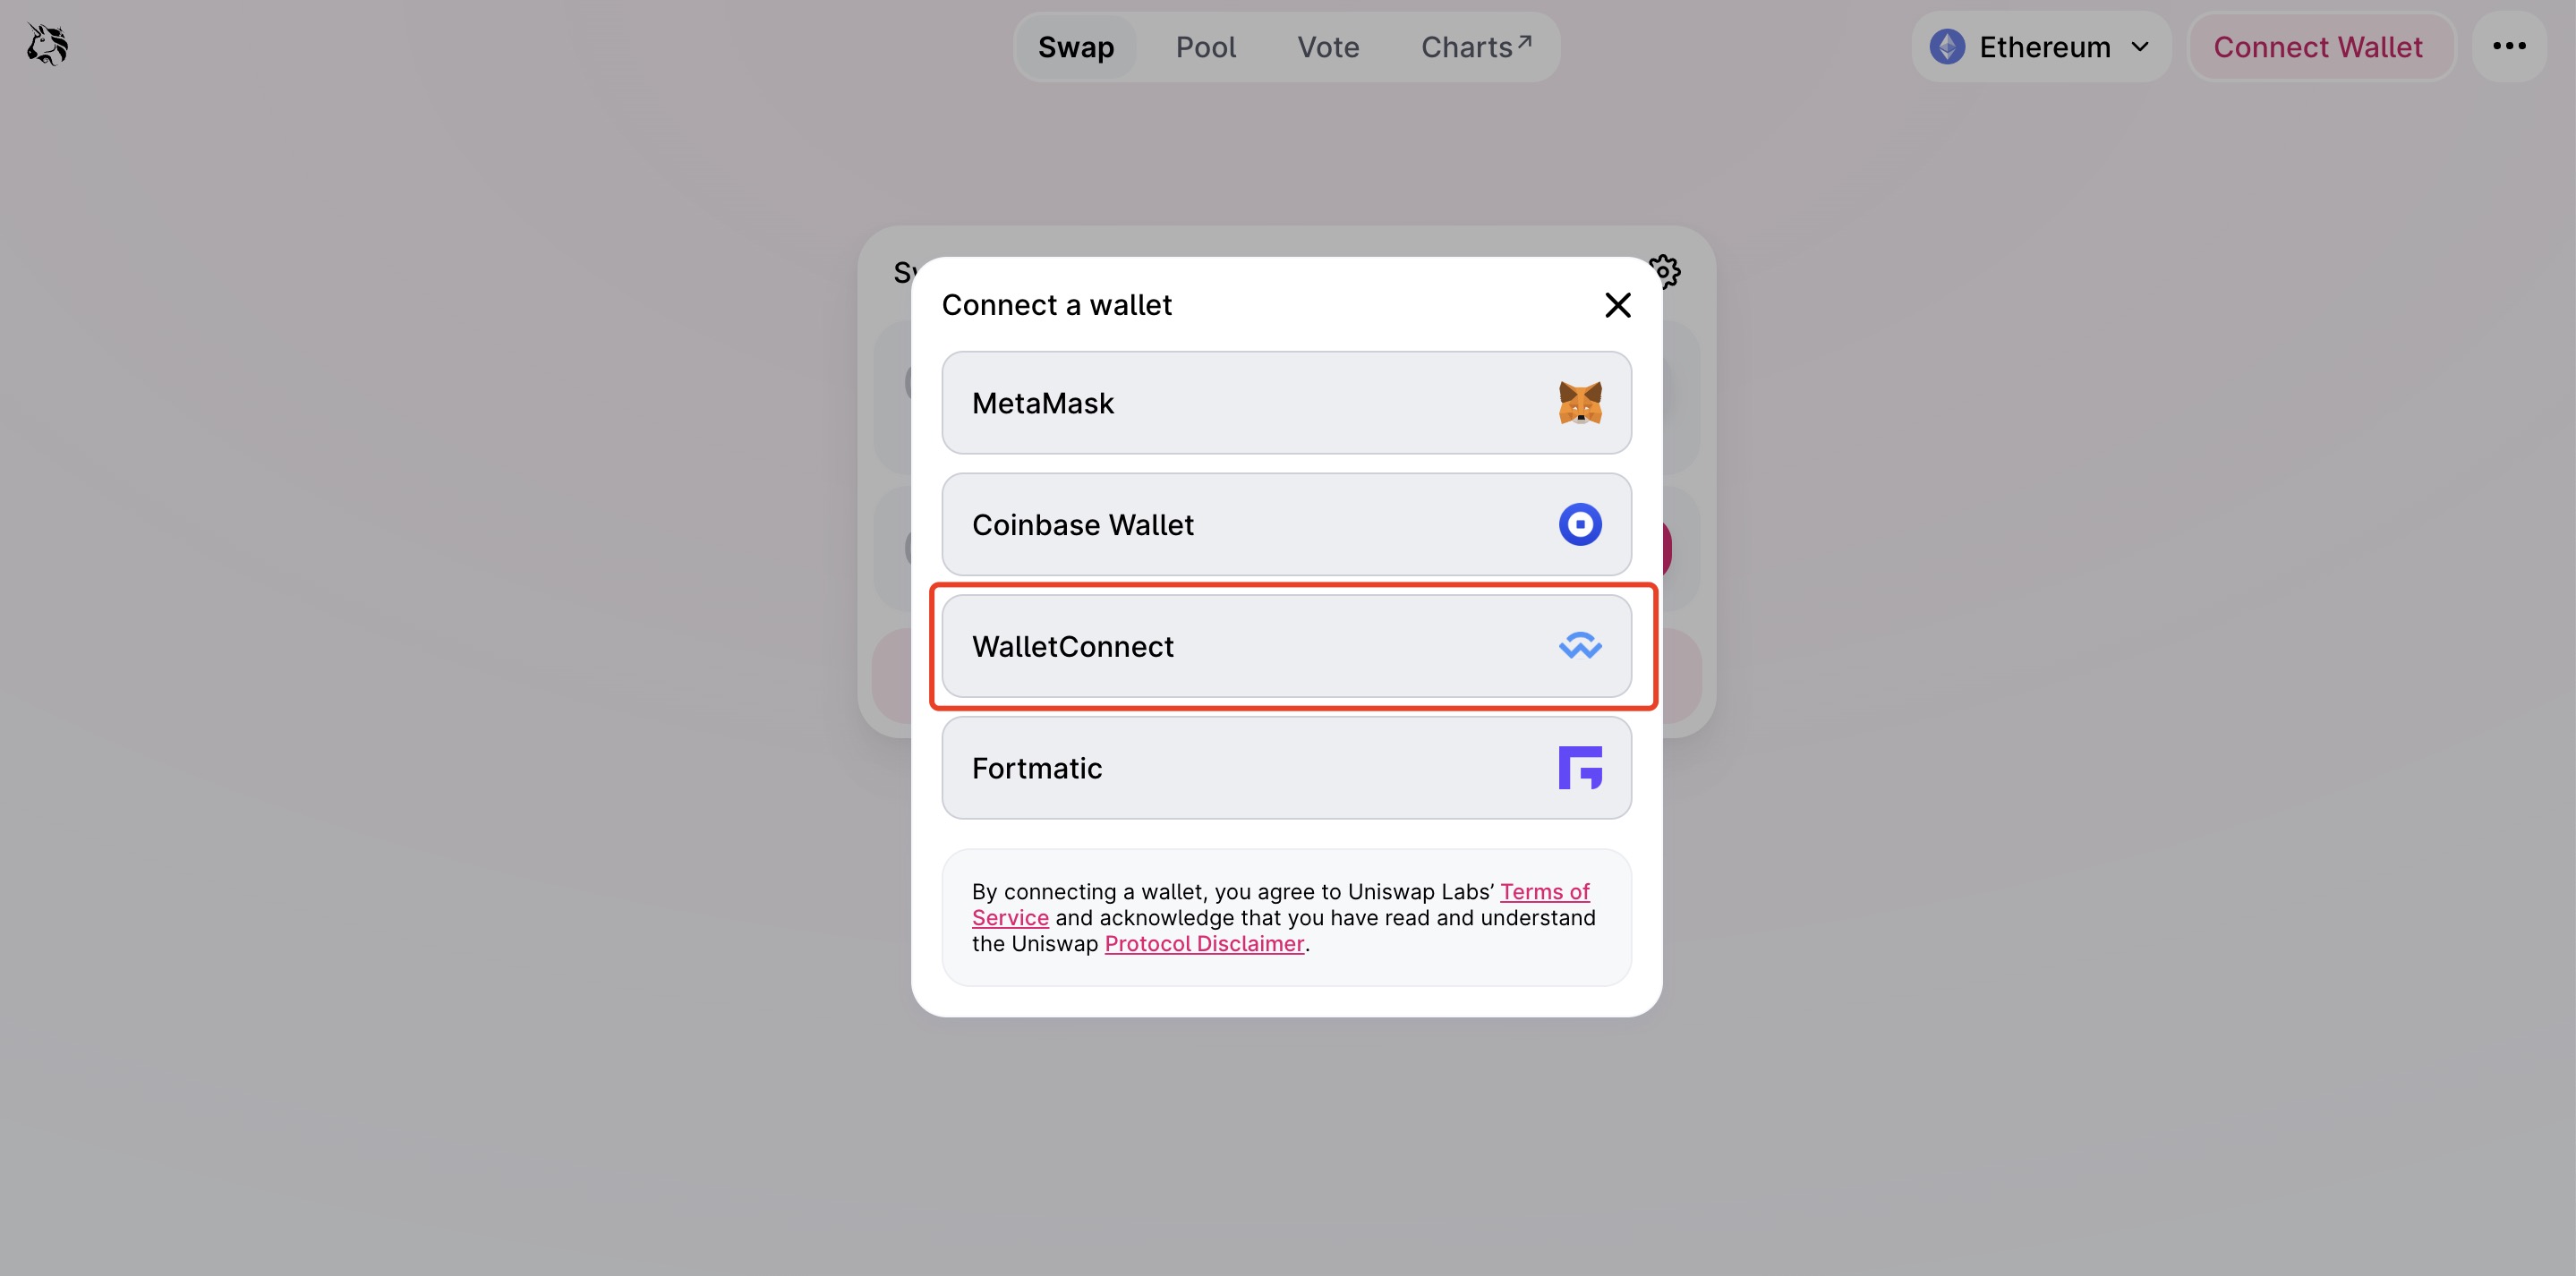
1. Web: Open the Uniswap website in your browser and select the trading pair you plan to buy or sell, click on [Connect Wallet] below the trading pair or [Connect to a wallet] at the upper right corn or of the webpage, select [WalletConnect], and then a QR code will pop up.
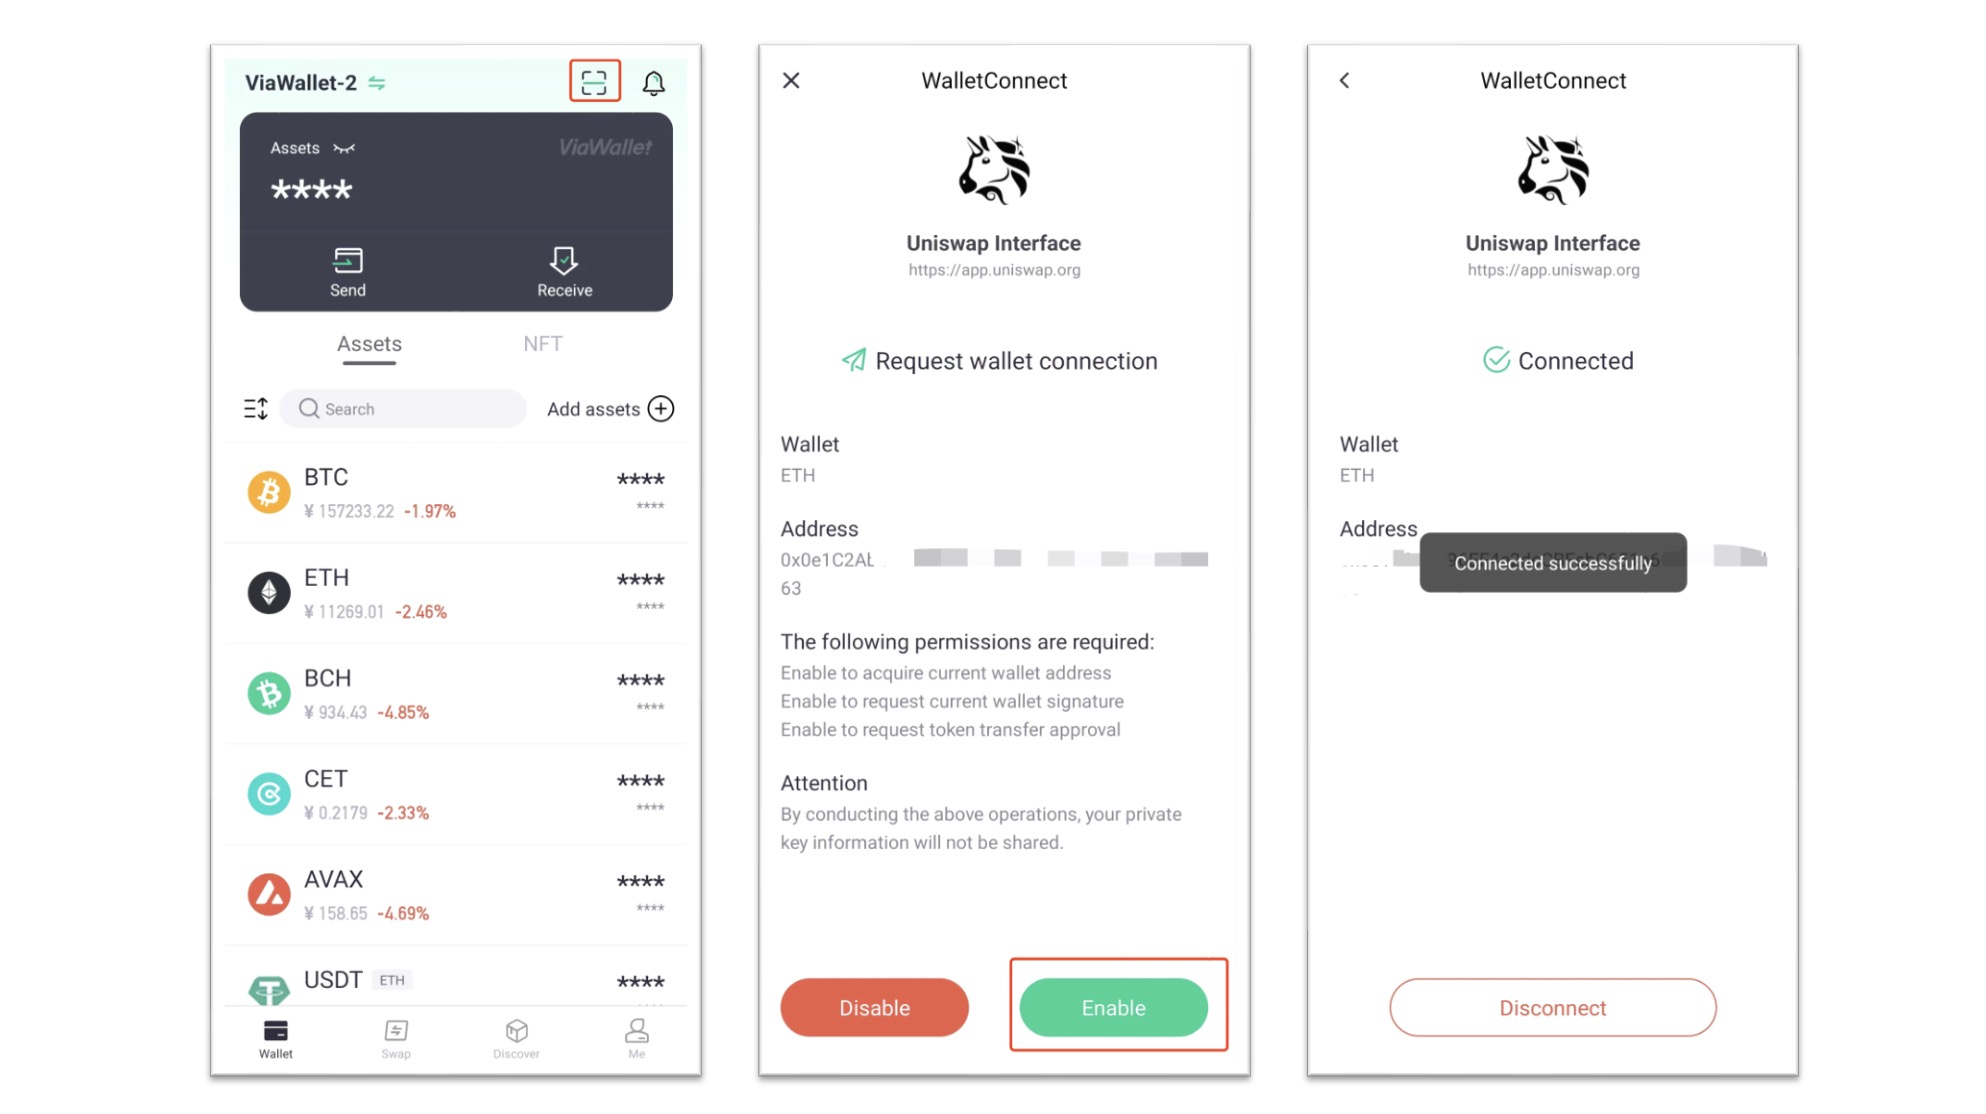
2. Mobile: Open CoinEx Wallet, tap the button in the upper right corner to scan the QR code on your screen. At this point, you will see [Request Wallet Connection] in CoinEx Wallet. Tap [Enable] to complete the connection.
If you want to start trading ETH/USDT, for example, all you have to do is set the buying/selling amount on your computer, and click on [Swap] (from ETH to USDT) or [Approve USDT] (from USDT to ETH). At this point, you will see [Request Transfer Authorization] in CoinEx Wallet. Once the relevant information is verified, tap [Confirm] to initiate the transaction.
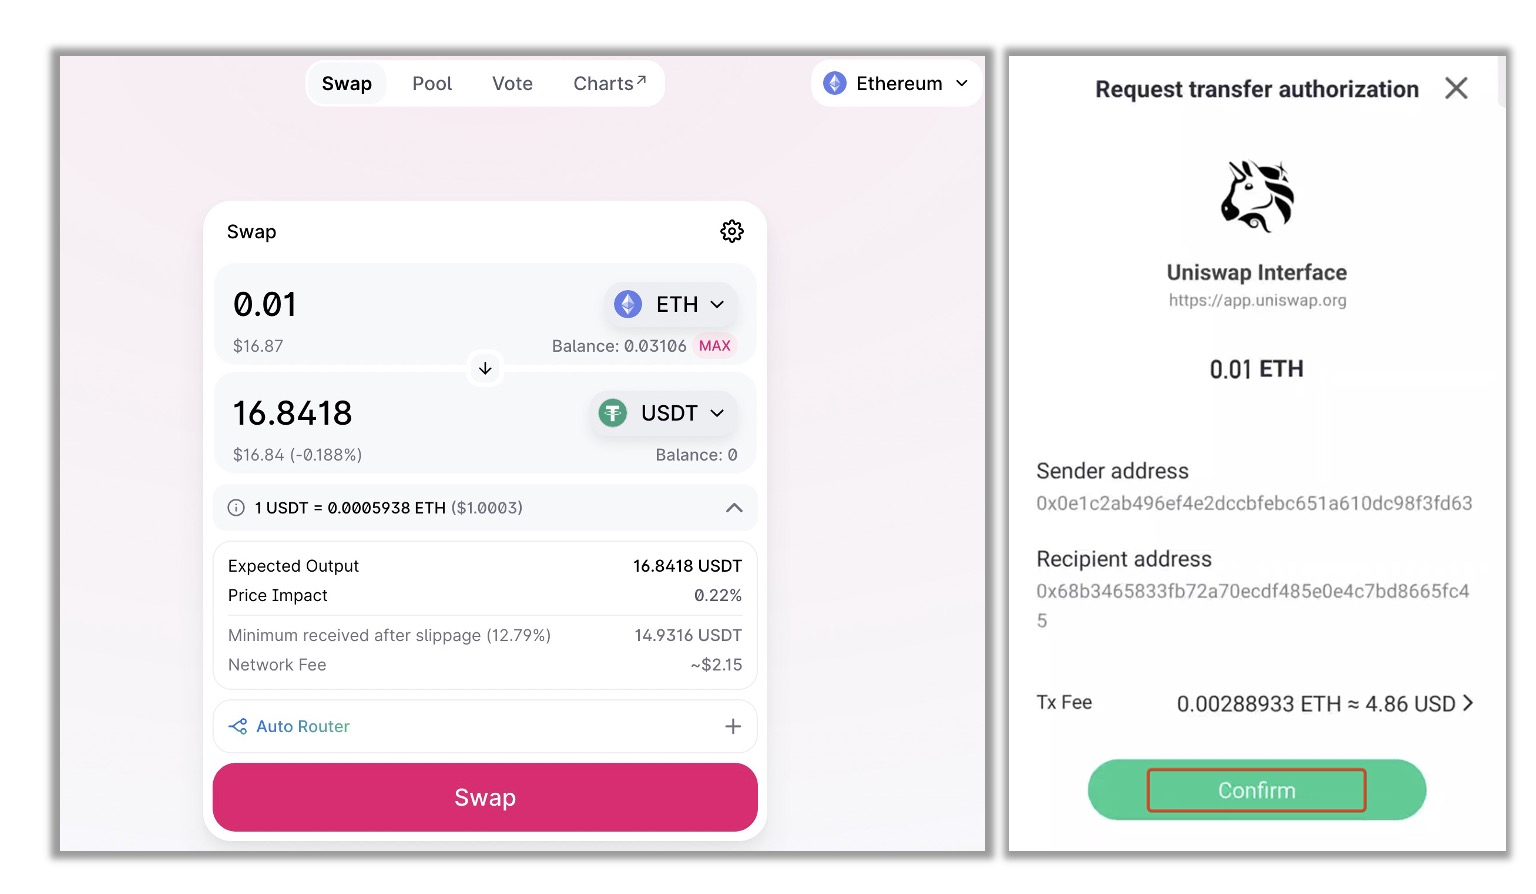
CoinEx Wallet has made DeFi significantly more accessible. Why not download CoinEx Wallet and get started with DeFi now?
Last but not least, please account for risks in DeFi and make prudent investments!


